Login with your eRecruiter Account
|
|
|---|---|
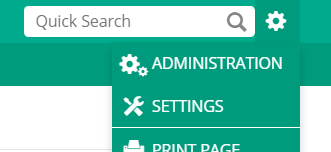
Click in the detailed menunavigationbar on the "E-Mail Templates" Here you can edit your E-Mail-Templates, delete them or create new Templates edit: Just click on the Template's name to edit delete: Click on the delete-button new: Create new Templates with the | |
If you create a NEW Template, you have to configure the settings of your Template: Name: Give your E-Mail-Template a clear name Hierachy Ebene: Should the Template be available for everyone? For a group or just you? Action Add the Workflow-Activity, where you will need the Template Example: A Rejection can be connected with the Activity "Reject Applicant" Now add the Text of your E-Mail-Template and use some Placeholders | |


Placeholders
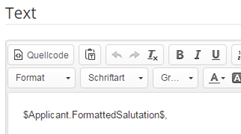
Ein Platzhalter hat den Sinn automatisch die Informationen aus der Datenbank zu ziehen, ohne dass Sie jedes Mal die Daten selber suchen müssen. Zum Beispiel, verwenden Sie einmal den Platzhalter für die Bewerber Anrede, automatisch bezieht der eRecruiter die gewünschten Daten aus dem System und zeigt den richtigen Namen inklusive Anrede und Titel an.VorschauA placeholder automatically fills out Information from the Database. For example - use a placeholder for the Applicants salutation. The placeholders are orderd by the object (Applicant, User, Job) and a little description of the placeholders-outcome. Use the Example:
|
|
| ist die Quelle woher der eRecruiter seine Daten bezieht oder welche Abfrage er stellt. Ein Platzhalter ist immer umgeben von dem ‘$’ Symbol, also steht es am Anfang und am Ende. Innerhalt der zwei ‚§‘A placeholder is always sourrounded by the ‘$’ symbol. In between will always be the source ( the object) and the action (what should be the result) $ SOURCE . ACTION $ | |
|---|---|
Die meisten Platzhalter befinden sich bereits in der seitlichen Liste von Platzhaltern und sind einfach durch einen Doppelklick in die Vorlage einzufügen.Sie können beliebig viele Platzhalter benutzen, wenn Sie sich nicht sicher sind, ob Sie den richtigen Platzhalter ausgewählt haben, können Sie durch einen Klick in die Aktionsleiste auf den ‚Vorschau-Button‘ eine einfach Kontrolle durchführen. Eine Signatur müssen Sie niemals einfügen, diese wird automatisch aus ihren bereits abgelegten Signaturen entnommen.Sie können die Signaturen ganz einfach verwalten, indem Sie sich in der Detailnavigation auf den Raster E-Mail-Adressen und Signaturen begeben. Ist ihre E-Mail-Vorlage fertig? Dann klicken sie auf |


| borderColor | #00A088 |
|---|---|
| titleColor | #ffffff |
| titleBGColor | #00A088 |
| borderStyle | solid |
| title | FAQ |
How to use placeholders?
| Info |
|---|
- Which placeholder to use for what?
| Info |
|---|
Please notice: Your signature will be automatically added to your E-Mail if it is send. Edit your signature in the detailed navigationbar in the You created the perfect E-Mail-Template? Please save your draft with the |

| Panel | |||||||||||
|---|---|---|---|---|---|---|---|---|---|---|---|
| |||||||||||
|
